CE tested out the Nyko Data Bank Plus and we gave our feedback on how well it works. This should serve as a brief review of our personal experience with the product and with some tips for install as well.
The Nyko Data Bank Plus boasts the ability to use your original PS4 hard drive (or any 2.5″ HDD) as well as your added 3.5″ hard drive that you buy separately. Nyko doesn’t include the hard drive but gives the hardware to make expanding your PS4’s storage a reality and with relatively easy instructions. However, making sure your console can run with higher capacity hard drives is an important pre-install step. The model number will be labeled on its original packaging or on the back of the PS4 console. Up to 4TB will work with models below CUH-1200 and for models above CUH-1200, you won’t want to exceed 8TB.
 Installation: Slide off the top left panel of your PS4 to attach the data bank. You still have to remove the 2.5″ stock hard drive to place Nyko’s SATA connection port but you now possess a hard drive bay for any 2.5″ laptop HDD that is plugged in underneath where the larger hard drive will go. With a couple of screws to deal with, there isn’t much to confuse with the alteration.
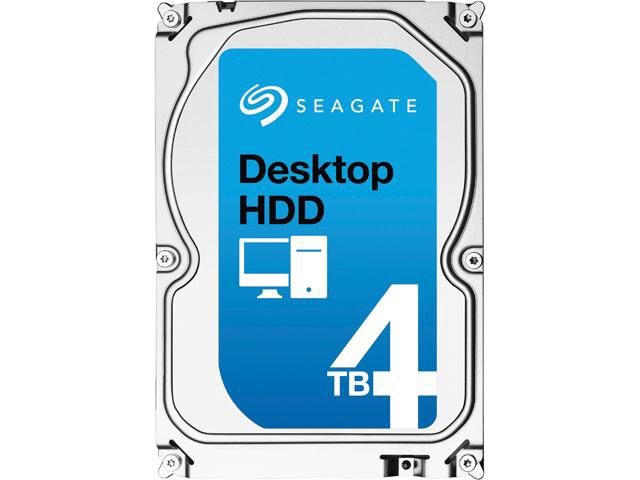
Notes: We kept the stock 500 GB PS4 hard drive for use in the lower bay and a Seagate 4 TB Hard Drive in the upper bay to eliminate any issue of ever juggling data for a long time.
Reaching the steps of inserting both hard drives gave us trouble. The female connection between the data bank and male connections for the hard drives were not seating well. Carefully but firmly push the hard drives to securely connect within the data bank. We noticed that the 3.5″ hard drive needed to be forced in after trying everything else. Try this at your own risk but we seriously had to push the HDD into connection with strength you normally wouldn’t want to use when dealing with sensitive computer hardware. These things don’t slide in easy, although you’ll know everything is seated appropriately if all the screws line up. If you have to force screws into alignment with the casing and screw holes, then the hard drive is not going to connect. Otherwise, the data bank installation was a breeze.

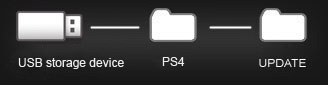
The update file instructions are located here: Playstation Software Update
Keep in mind that the file you’ll need is read further down the web page and is a larger file size (They list two different updates). This should give you the full system firmware update to program a brand new hard drive to recognize the consoles operational software. Look down the page for the paragraph titled: “Perform a New a Installation of the System Software” and read their instructions thoroughly.
Operation:
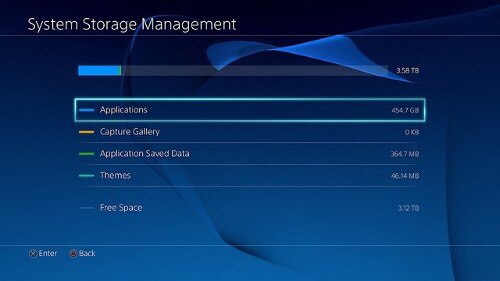
Once you have everything up and running you’ll see that the button on top can switch from each hard drive but only when the console is off. All data and saves will still be accessible while enjoying the fact that you won’t have to delete anything again when using your 3.5″ HDD upgrade. The red indicator light that lets you know which hard drive is selected is annoying but for the most part the data bank looks the same as the first version of Nyko’s expansion hub.
Notes:
Switching hard drives is just a push of a button but wipes controller info. That will require you to plug in via USB to recognize the controller to reinitialize its wireless connectivity when you go back to the hard drive you weren’t using before. It’s not really an issue unless you go back and forth to each hard drive frequently.
Performance wise, we ran Uncharted 4 smoothly and thought it ran just as well as on anything else. The Seagate 4TB 5900 rpm HDD seemed to do the trick and is certainly one of the more affordable hard drives on the market. Data cache issues may arise if playing for extended periods of time with open world games but noticed powering off the console and trying again solved the problem of choppiness. If rendering seems slower than you’ve seen, we would try powering down and turning on again as well. These hiccups rarely happen, unless your OCD about those sort of things, buying the latest and greatest hard drive isn’t really necessary. We still would recommend a reliable one.
We read that standby mode may irrevocably shut down the console after 5 minutes with your upgrade but did not run into that problem ourselves. Make sure you have the most up to date PS4 system software in case that could be the cause.
Overview: We definitely recommend giving the Data Bank Plus a shot. After the relief of not having to budget hard drive space every time you want to play a new game and the hold up with clearing more room for game updates, this was certainly worth it.
Hopefully this review sets you in the right direction. It won’t be surprising to see more PS4 fans open to options for improvising the console’s data capacity in the future. I only wish I did this earlier.
Check out this YouTube video from Unbox Therapy covering the older version of the Data Bank to get a better idea of what you’re dealing with:
-Matt